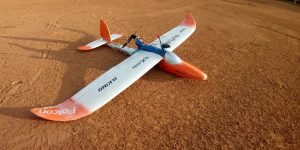
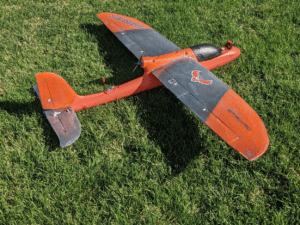
A recent survey on the INAV Fixed Wing Group as to the best first plane for a new pilot revealed a clear-choice winner in the group, AR Wing. The INAV AR Wing Stock Build is a document help you build the kit version of this plane.
- A stock build as your first build
- Build instructions
- The foam build
- The Parts-Explained
- AR Wing Kit/ RMRC Recruit Kit
- Racerstar BR2212 1400KV
- APC (style) 8040 Propellers
- BLHeli speed controller 30A or greater
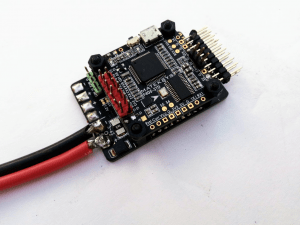
- Matek F405-Wing (Do not deviate from this)
- FPV Camera ( Whatever fits your budget)
- VTx
- Good antenna
- XT60 male connector with silicone wire
- A cable long enough to go from your FPV camera to your flight controller.
- Metal Gear 9 gram servos
- Rx
- GPS
- Soldering Supplies
- E6000
- Decals
- Lamination
- Settings
When you’re thinking about the INAV AR Wing, I would suggest to buy the kit instead of the PNP. You will want to put in all your own gear, including metal gear servos and a good-sized motor that can fly on 3S.
There is a reason why this plane is simply beloved, SonicModell got it right. This plane can rip up the sky, or can fly very docile for a wonderful relaxed FPV experience! This is a plane you’ll love and probably will never outgrow. www.INAVFixedWingGroup.com has alternative builds to the INAV AR Wing, ones that are better speed and endurance.

A stock build as your first build
I have a few different versions of this plane. What I am going to share with you is the one I fly the most. I will explain the logic of why I chose certain parts and build processes. This is a relaxed, short-range FPV build for the INAV AR Wing. . I’ll fly it out a kilometer and bring it back. It’s rock solid. It’s a great plane to start off with and move on from here,
The build process
This guide is a two-step process, first we build the electronics for the INAV AR Wing, and second, install the electronics into the plane. I’ve done it both ways, building the electronics along with the foam. Building the electronics first is about one-hundred times easier. First, you’ll want to keep the foam ding-free. for your maiden photos. After that you can feel free to crash it. You’ll also need to make sure you can arm your plane and hear the motor start to spin before you can move on. The foam building is simple and doesn’t take long.
I am going to mention this up front, the F405-Wing flight has power and ground reversed for the VTX and FPV Camera. You will need to swap them on the servo cable to match the flight controller. It’s not difficult to do, with a knife and following a video it should take you less than ten minutes to swap. However, if you don’t do this you will blow up your VTX and FPV Camera. This could be upwards of an $80 mistake. So, let’s steer you clear of this issue.
The other thing i’ll warn you about is that the USB port falls out extremely easy. You should glue it in place or solder it in place. If you’re uncertain about how to do this, be sure to ask the group.
I am also very excited to say that Andrew Newton made a video, roughly following this plan. Actually, he went his own direction for most of the INAV AR Wing build. I think it’s exciting because you get to see an alternative way of making the build. But, he knows a lot about building planes and he knows enough about INAV to comfortably go off-script.
What I am doing for you is lowering the barrier to entry into INAV Fixed Wing with the INAV AR Wing build guide. I want to be very clear with you that I will help get you most of the way there, but not 100%. This is what works for me, but it may not work for you. You can load the settings and many things will work, then you can change things to fit your needs. You will need to get your hands dirty in order to get into INAV for fixed-wing. Here’s the shopping list, I have a detailed description at the end of this document for each part.
This is an excessively long document
The amount of hand-holding in this document is off the charts. You’ll never see it again in any other build document in our group. We actually have a format now that is streamlined. I know people will ask me to write the same document for a Bixler 3 or HD Wing. Sorry, this took a long time. This is a good document to use for your first build because after this build you’ll be fine with the broad strokes of the shorter documents.

A word about the links
We do have links to the suggested products which can be found at Banggood. To help make it easier Banggood has helped make a MASTER PARTS LIST. The list contains most everything you need to build the AR Wing. If you select any parts they will cost exactly the same as if you didn’t click the links. Banggood seems to be running sales nearly nonstop so you will notice that the prices fluctuate. These are products we can vouch for. You are free to select other options. With that being said Banggood tends to sell name brand versions of the products. You can find the F405-Wing for less at Ali Express or eBay. These are often cheap knock-offs of the real products, and the little money you save will be wasted if you have buy the merchandise again.
Our links are affiliate links, which helps fund other ventures we’re working on. We don’t make a lot of money, and what we do make gets funneled back into the INAV Fixed Wing Group.
Build instructions
Flight controller
Hopefully you bought a legitimate version of the Matek F405-Wing and not a knockoff sold at places like Ali-Express. You will need to go to Matek’s website anyway to get the wiring diagram.
Here’s the link to the Matek Authorized Distributors, if in doubt, post a message on the INAV Fixed Wing Group and the CEO of Matek will reply to your message.
There are quite a few more distributors in the United States than listed on the site.
Step 1
You are going to need to locate INAV 2.41 (or later) configurator (INAV download page). Download the correct version for your computer and install it. The first step will be to hook up the flight controller (before soldering) to your computer and flash the latest version of INAV to it. This will take anywhere from ten minutes to all evening depending on your computer and skills. Here are some suggestions.
A Reboot your computer and plug the USB cable first into the flight controller and then into a USB port on your computer. The flight controller should light up.

B. You should be able to select a com port other than COM 1 to connect to the flight controller. If not, read the instructions on the home screen of the INAV Configurator. You’ll need to download CP210X Drivers, STM USB VCP Drivers to ensure that you can create a com port that you can use. While you’re out looking around, download ImpulseRC Driver Fixer .
C. When you establish a working com port you should be able to boot into your flight controller and most likely it will drop you into the CLI command line of INAV. Not a problem, at least it’s working.
Step 2
Hold the boot button in on the flight controller (it’s black and close to the USB Port). Unplug and plug in the USB cable into your computer with the button depressed. You should see “DFU” Go to ‘firmware flasher’ select “Full chip erase” and select the latest version of INAV and target: MATEKF405SE from the drop down list. You will want to download the hex file online. This will rewrite the firmware on the EPROM in the flight controller. It will let you know when it finishes. You may need to unplug the flight controller close and reopen the INAV Configurator. You should be able to log into your flight controller
Here’s some tips about firmware and the flight controller
- The USB port breaks off super easily. Use your finger to help support it and connect and disconnect the USB port as little as possible. Most of my flight controllers have been connected to a PC fewer than five times. I have no issues connecting to the INAV configurator and changing settings when needed, but I avoid the urge to just connect to a flight controller to check things out.
- INAV changes constantly, but key features in INAV change rarely. You do not need to upgrade to the latest version of INAV unless there is something specific you’re after.
- Solder your flight controller

Flight controllers aren’t terribly expensive, but you probably don’t want to buy it again because you muffed up the solder job. If this is your first experience soldering there are many videos about soldering flight controllers on YouTube. Go watch them. Also, you cannot fake on the job with the wrong equipment. You will need to invest in good equipment to do the job. I’ve been fairly happy with the sub $10 soldering irons from Hobby King. You need a tip that’s small enough to solder the pins, and an iron that is hot enough to melt the solder. You will also need good solder and flux. I know these are extra expenses you may not have thought about. This is the first of many flight controllers. Buy good equipment. When you get into this aspect of the hobby you’ll be doing a lot of soldering. The pins are very small, so you will need either a good magnifying headband or video microscope.
This is the page for the F405-Wing flight controller. Take your time and make sure all the pin colors match what you see in the photos. Take your time working one set of pins at a time. Keep the board clean.
When you’re done soldering you will need to examine your board and check to make certain that you haven’t bridged any pins. Check your connections with the continuity checker of a multimeter. Before you plug this board into your computer or flight pack, make double-sure it’s clean. When you’re ready, plug this board back into your PC and hold your breath. If it lights up, congrats, you’re on your way!
The last things I solder are the XT60 connector and ESC to the flight controller. These are big pads. For this purpose only I use an 80-watt soldering iron to heat the pads (lightly) and spread out solder. I then tin the wires and make certain that I have a very, very good solder joint. You don’t want the plane to be in the air when a solder joint fails.
You will also need to put a 330uF capacitor on the red and black wires to your speed controller, as close to the speed controller as you can get. Your speed controller will put out voltage spikes that kills the flight controller. This helps prevent that situation and will help clean up your video. They are cheap and very much worth the time and small; investment. Get the polarity right when you install them.

Starting your flight controller with your LiPo Battery
Before you plug the battery in, why not give it one last check to ensure that ground and VCC are not bridged? You do this once again with the continuity check on your multimeter. When you are sure, plug it in and hope to see things light up. If it does, congrats, you’re about 1/3rd done with the build. The hard part is over.
Loading the build file
The CLI settings will work for the F405-Wing using a BLHeli ESC and OpenTX on something with enough switches like an FrSky QX7 or X9D Plus, Horus, Jumper 16, other OpenTX radios. It won’t work with the most of the new, lower end, newer FrSky radios such as X9 Lite. The CLI settings can be found ant the bottom of this guide.
Take this file and set it up at your own risk. It’s one and only one file, we’re not going to make versions of it for all the different flight controllers on the market. If you want something changed, you’ll have to do it yourself. For example, you can go into the configurator tab and change from Oneshot 125 to standard for your ESC if you use a standard ESC with a BEC. At least you have something to work with. This should get you up and running fairly quickly.
Things like Rates & Expo, PID Settings, and FeedForwards are defined for a fairly safe build. There is a chart at the end where you can update these following the advanced setups of Marc Hoffman’s INAV AR Wing builds.
Many hings that aren’t turned on with this build. There is no SmartPort, no Smart Audio, no LED, no buzzer. If you follow this diagram on the Matek page, they will show you where to plug those in and how to turn them on.
Darren Lines wrote a very good model for OpenTX. If you go into the INAV Fixed Wing Group page on Facebook, and then go to the “Files” section (you need to be on a computer to do this) you’ll find the model files. There is a great PDF that explains how to set this up on your FrSky radio (It works with the QX7, X9DPlus, Horus, T12, and T16 radios). Yes, it’s a bit more work but the radio is completely setup with voice commands. It’s worth buying an FrSky, Jumper, or RadioLink OpenTX transmitter just to enjoy it. The settings at the end of that document has the commands needed to put into the flight controller already installed. Thus, if you have the FrSky Radio or Jumper 16, why not simply grab the file (It’s a .zipp file, grab it and change it to .zip, then it will extract)? If, this isn’t your scene, or you don’t have OpenTX, you will need to set up the radio by yourself. Follow the group’s INAV Fixed Wing Setup Guide to learn how to do this.
The box build
Resist the urge to throw the flight controller into foam as soon as it’s built. You’ll want to test everything outside the plane. I like using small boxes and setting up everything.inside the box so that I can take it outside and find satellites. Once again, refer to this diagram.
If you’re using a BN-220 the colors go (from left to right) Black/Red/Green/White. It’s important the S3 and S4 servo wires go to the appropriate sides of the plane, follow the diagram on the Matek page. From behind the plane S3 is left, S4 is right.

Big, huge warning, read this before hooking up your VTX & Camera
YOU ARE ABOUT TO BLOW UP YOUR CAMERA AND VTX!!!!!
If using servo plugs, the red and black on both the VTX and camera are REVERSED on the Matek F405-Wing board. This MUST be fixed before you plug in your camera or VTX. If you plug it in, even once, and power it on, they will blow up. Can they be fixed? Nope, throw them away! Sorry. If this does happen to you at least you’re in good company.
This is how to remove the wires, you will have to switch the order on red and black. Cable swap video
You will see that it’s Red/black/white or yellow for this flight controller. This isn’t the normal order. This takes less than 10 minutes to master. When you reverse the order of the red and black pins, tug on them to make sure they don’t come out, if they do, flip the orientation into the plug by 180 degrees and try again.
You may not have enough cables or the right cable, and here’s a tip, the servos won’t reach the flight controller so you’ll need servo extensions. 150mm (6 inches) should do. It is common to place another order at this point for small parts that you didn’t know you needed.
There is a lot to this step, you’ll need the model put into your OpenTX radio, the receiver has to be bound. If you’re using the XM+ you should upgrade the firmware to get RSSI working. You will also need to load your preferred font (I prefer Impact) and make certain that your camera’s orientation works for your OSD layout. I set this up for 16×9 (PAL). If you’re using 4:3, portions may get cut off. If you are not seeing the OSD your OSD setting is set to PAL when it needs to be NTSC or vice versa.
When things are working right.
- You can see video from your camera –HUGE WARNING, an antenna needs to be on your VTX!!!!
- You can see your OSD
- The OSD isn’t cut off
- You can move your servos, if one move in the wrong direction, it needs to be reversed. This can be accomplished in output tab in the INAV configurator, not the transmitter. You never use your trims or other settings in your transmitter to fix issues in INAV.
- GPS: You may need to change the ground assistance to match your part of the world. You will need to be outside or close to a window to find satellites. It may take a few minutes to find them the first time. This is in the configuration tab.
- If you’re able to arm you need to hold onto the motor wires and see if you can get the motor to spin. If you don’t do this the motor will go flying by itself!
It’s a lot of work to get to this point. Don’t get frustrated. Work through one problem at a time. The group can walk you through this. If you made it this far, congrats, the foam portion will be easy.
About the OSD. The OSD that comes with this build is a 16:9 PAL. You will need to setup the “Impact” font. If you still don’t see the font, change the setting from NTSC to PAL or vice versa. Your camera dictates what it’s using. If you’re using PAL, you will need to move things around in the OSD so that everything fits. The OSD is controlled by the left most toggle switch on the radio. If you’re not using the group OpenTX the default OSD isn’t great so you’ll need to learn how to change it on your own. It’s not difficult to do this.

Here’s a secret photo of Marc Hoffman’s house. Notice all the INAV AR Wings?
The foam build
There isn’t a lot to say about the INAV AR Wing build. The wings basically screw onto the fuselage. Just make sure you put the carbon spar through the middle. But, I will do a slide show and talk about how I’ve built this plane. I will say that if you don’t at least mildly glue on the winglets they will fall off your INAV AR Wing about every other landing.

This is a photo of the wing attaching to the fuselage. You can see the carbon fiber spar runs through the fuselage, so make certain you leave room for it. There is a channel in the INAV AR wings where the servo wires slide through. You basically have to shake it until it slides through the channel. You’ll also have to put a servo extension cable on your servos because the wire won’t be long enough to reach your flight controller. You can see where I mounted the BN-220 GPS module on the fuselage of the INAV AR Wing. I have a better photo of this. I took a 16 penny nail and got it red hot on a stove and pierced a hole to run the wires through the rear of the plane.

This INAV AR Wing didn’t have the score in the fuselage to run the FPV wires. I made a cruise one with a knife.

This is a closer image of the BN-220 GPS I scored a hole in the rear of the plane to plant the GPS. As mentioned before, a hot nail made the hole to run the wires. This is how the module goes, with the silver bulb thingy on the top. You can also mount it on the bottom of the wing also with the bulb thingy facing up. The foam won’t affect the reception. I’ve done this before with other planes. I prefer it on top now because it keeps the wiring dry and free from abrasions. The important thing about GPS is to get it as far away as possible from the VTx on your INAV AR Wing.
Since I ran the VTx onto the wing I needed some space to run the VTx wires in under the canopy. I did the notch with a hot nail. If you’re not running a VTx on a wing you can skip this step.

There are certainly differences in the quality of VTxs. Marc Hoffman has only a handful of planes and swears by Matek VTxs. I make a lot of Crap Builds and thus throw INAV into everything. My favorite VTx is one that costs around $8 from Eachine. Thus, it’s up to you to figure out how much you want to put into this project. Andrew Newton’s build video of this plan had him putting the VTx in the canopy of the AR Wing.

I know I will take crap for this, but this is how I roll. The VTx is better off far away from the RX and GPS. I like to space all three of these devices apart from each other on the plane. You can mount it on the bottom of the INAV AR Wing. It easily gets damaged when it’s under the plane. I like having the tip of the VTx antenna hanging off the leading edge. I bury the VTx into the foam so it’s flush. It also gets nice air cooling this way. I’ve tried it in the canopy. I didn’t like it in the canopy because of the low airflow and the VTx transmission was poor when I flew high.
This is the cheap Eachine VTX I mentioned before. It’s an RP-SMA. You may want to take some time looking up the differences between SMA and RP-SMA antennas and where to find them. I am finding in the United States, a lot of suppliers sell mainly SMA antennas.

This is Marc Hoffman’s cheap and dirty version of the INAV AR Wing. He laminated the wings with something similar to Ekonocoat. All the electronics are near each other. If you go this route, make certain you have good airflow. There are custom 3D printed canopies you can use to give extra airflow.
So, let’s do a critical evaluation of Marc’s build. Nice job on the lamination. The wires are a bit messy, but who cares? If you want to you can twist your wires to give a cleaner look. It looks like he has the RX on the left and VTx on the right. Marc printed a 3D print of an antenna mount. I find that I get better reception with the antenna under the plane. This isn’t the high-end Foxeer Lollipop 3 antenna. He’s going to check out the range and let me know if the Lollipop 3 gives better range.

This is another INAV AR Wing from Marc Hoffman. I didn’t recognize it at first either, that is a Flysky X6B receiver next to the 3D printed green clips. Yes, the Flysky FS-16 that’s also sold under the Turnigy and Eachine brands. You may have purchased one and moved on from it. There is good and bad news about the modules. Some of the modules do SBUS (known as IBUS). There is a hack to make the 6 channel model a 10 channel model. The FS-I6 has 4 switches, only one is 3-way. But it has two knobs. If you’re resourceful, you can do a hell of a lot with this. That’s the good news. But, we’ll leave it up to you to figure out how to setup the modes to work with your radio. Marc did some mods and got some pretty good range out of this TX. You can message Marc for more info.
He has the F411-Wing under the RX, it’s hidden in this image. As compared to his other build, this one is super clean though it has some more basic gear. It has a stubby Foxeer Lollipop 3. I freaking love this antenna!

Marc cut out the bottom with a knife, 3D printed the parts, cut a channel to the servo channel and ran the wires with the servo wires. This is super clear, just avoid landing in puddles. The part was 3D printed. If you have a 3D printer you can certainly add a lot of cool features to the plane. Just don’t get carried away. It adds weight if you’re not careful.

No, I didn’t zip-tie this all together, this plane was taken apart and shipped to someone else. Anyway, this is how the F405-Wing was mounted. You can also see the capacitor near the ESC. In the far back right corner you can see the RX servo cable coming out from the fuselage. This time I ran it through the channel where the servo wires run and used e6000 to fill in the gap.
I use E600 to glue it all together. You will need to glue the winglets on because they will fall off at each landing. I put the VTx on the wing and the antenna is next to the FPV camera. With this build I put in 57g of weight in the nose.
The servo wires slide through a channel in the wing. You just have to shake them to make sure they go all the way through. You’ll need to put an extension on the end. I mark them with 3 lines for S3 and 4 lines for S4. This makes putting them back in easy should they fall out.

The INAV AR Wing balances with a GoPro in the nose. You do not want to put a GoPro in the nose when you’re maddening the plane.
Since I first wrote this document, someone has posted a photo of a broken GoPro on an AR Wing, which occurred during a maiden.
So, what I do is find 58g of weight (2 ounces). I used to throw batteries or led into the nose. The problem is that as the plane banks left the batteries also drift to the side that’s turning which can affect roll. What I did was buy some Hobby Wood from Home Depot and I cut it to size, painted it black and then used black tape to tape the batteries to the wood. It doesn’t move! The most important thing is that you need to make certain that the plane balances on the CG marks on the bottom of the plane. Some people say it’s best to balance just behind the marks and fly it a tad nose heavy.

The motor I use to test out the plane is the Racerstar BR2212 1400KV. There was a time about 20 years ago where you had to justify, usually to your wife why you needed to spend $300 on a gas motor. The reason I bring this up is because I’m talking about $30 motors as being really expensive. The BR2212 1400KV isn’t top shelf. It’s around $6. There are better motors for sale. If you take this setup at face value and fly it full speed on 4S you’ll probably fry the motor. The 8” prop is too large for 4S. I put this motor and prop combination on my first INAV AR Wing thinking I would move on from the motor and replace it. And, it just works. I like this combination, it’s what I fly with most often. I Simply put one drop of oil on the bearing and make certain the prop is balanced. I use an 8040 prop with this motor with a 30A ESC. No complaints. I have hundreds of hours flying with this motor.
Update- Well, I jinxed it. The original motor on my INAV AR Wing died not too long after writing this document. The small grub screw between the shaft and the bell loosened up and the shaft moved which caused the motor to overheat and die. I got around 300 hours of flying out of that motor. Not bad for $5!
Other than putting one drop of sewing machine oil on the bearing, take out the grub screw, apply thread locker to the screw and reinsert it.

This is the servo I use, the MG90S from Banggood. You get 6 for $13. Pull the decal off on the side you’re going to glue. I use E600 to glue it. What also helps is to use fuel line to hold the clevis together. I use a servo tester to center the servo, and then check it again when the servos are in the flight controller. You want the servos standing up perpendicular to the wing. You simply stick that servo wire into the channel and shake until it comes out the bottom.
Andrew Newton put in digital servos on his build. When we had Pawel on Wing Talk I asked him about digital servos and INAV. The conventional thinking is that digital servos work faster and thus the plane should fly smoother. Pawel seemed to feel that it wouldn’t make much of a difference.

This is the amount of reflex I put into the wing. Just slightly higher up than the surface of the trailing edge.
One of the group members wrote a post about this photograph. The common thinking is that the INAV AR Wing doesn’t need any amount of reflex. I suppose I could try running it back to flush at some point and seeing how it flies in manual.

This is the landing skid. It goes further than the fuselage. I cut it back a bit with a very large pair of scissors. I use E6000 to glue it to the fuselage.

All together- Once again, this is a plane built for a friend. This was the maiden build. No decals, RX taped down, no heat shrink on the RX. The maiden was textbook perfect. It was torn-apart and shipped out a few days later. I am not exactly in love with the VTx antenna but it did perform well. This plane will get decals and glued together when it gets to its recipient. I prefer the AR when it’s glued and laminated. It’s a lot sturdier and has lower drag with the lamination.

This is one of my INAV AR Wings. It’s the Marc Hoffman special. It has the Air B motor on it that he loves. I was waiting for him to share the specs with me before finishing it. I put some extra decals on it. Kona was a beloved dog and I’ve gone to naming my planes after people and pets I’ve lost. This will get a GoPro 7 in the nose and I will use it as a video rig.
The Parts-Explained
New-Find all your parts easily
Banggood has helped us make a SUGGESTED PARTS PAGE so that you can easily find the parts you’ll need for this build. When selecting parts, it’s one of each of the following except for servos. You will need two servos
You are free to select other items, such as a different camera. Also note you may want SMA instead of RP-SMA for your VTX antenna choice. The list contains items we’re familiar with and can vouch for their quality.
AR Wing Kit/ RMRC Recruit Kit
If you can wait for the kit to show up from China you can save a few bucks if you buy it from a Banggood or other Chinese supplier. Often it comes with free shipping . The RMRC is probably going to set you back and extra $30, but it’s sold in the United States. If you live in the US or can get faster shipping from the USA you can be assured you’ll be getting the same plane. There is no advantage in buying the PNP, you’ll just end up frustrated.

Racerstar BR2212 1400KV
This is a $5 motor. It’s not top shelf. I have yet to kill one (well, that’s not true anymore), and I have hundreds of hours on them. I put one drop of sewing oil on the bearing and it seems to quiet the motor down a bit. It’s 52g which is the main reason I like it. That weight seems to be just about right for this INAV AR Wing. Depending on the FPV camera used and other factors you’ll need somewhere around 60g of extra weight in the nose to balance the plane with this motor. For every extra gram put in the back you’ll need somewhere around between 3 and 4 times with weight in the nose. The plane can take it, but it will be a heavier plane. Which can be both good and bad.
The questions you may have is that you may have an old DYS D2826/6 2200KV motor that is also the same weight, or a BR2212 2200KV which is also 52g. Why not use them with a 6” prop? It does work but I’ve found that they are just very loud. If you can fly somewhere where noise isn’t an issue you’re fine. What about something lighter? Isn’t a lighter motor better? Yes and no. I’ve built this INAV AR Wing lighter. It does float nicely. But, I like this weight much better, it’s around 700g.
Update: As I mentioned earlier, I killed my original Racerstar BR2212 1400KV motor. I have replaced it with a Sunnysky A2212 1400KV motor. It’s okay. It seems quieter. The specs are hard to find on that motor and it seems like it seems that it’s missing 15% of its thrust.
Then, I tried the Sunnysky X2212 1400KV V3. I can explain that experience like this. It’s like when your band gets picked up by a major record label and you’re an overnight rock star. Suddenly you’re dating supermodels. Yes, it’s that much better. The motor is more expensive, by upwards of $20. Sell blood, get a second job, beg for money on the streets. You need this motor.

APC (style) 8040 Propellers
The propeller has to match the motor and the plane.
9” Will work with 3S, if you’re going to go this route, try an APC style 9045 propellers.
8” To me, this is the sweet spot for this INAV AR Wing. The 8040 gives me enough thrust to get up to cruising altitude fairly quickly. It’s also a bit underrated for the motor. So, heat won’t ever be an issue. I do like the low noise and slow flying characteristics of this combination.
7” This is the size you’ll need for a 4S setup. You may want to try a 7060 propeller. Your efficiency may be taking a hit.
Propeller Brands
The Gemfan APC style propellers seem to work well. If you not afraid to spend a bit extra, buy the Master Airscrew brand propellers in the same size. When you chip or break a propeller, throw it away. Get into the habit of using a warm, wet towel to clean your props after use. This will help make it fly a bit better. When a prop is out of balance it’s important that you balance it or it can kill your speed controller.
BLHeli speed controller 30A or greater
If you’re coming from quads I know you live and breath ESC’s, 16bit versus 32bit and all the various protocols. You come to fixed wings and we hardly care about any of this. The reason I like BLHeli speed controllers is because they are small and light. And they don’t have the 5V rail which you don’t need for a flight controller. If you insist on using an ESC with a built in BEC you’ll need to cut that 5V wire (red) or it will fry the flight controller.

The BLHeli suite has a lot of nice tools for upgrading the firmware of the ESC, setting the brake, and calibrating the motor. I know it’s something else to geek out with on INAV, but yes, it’s very powerful.
The one thing I am learning about ESCs is some of these little suckers put out a lot of electrical noise. The voltage spikes can very easily kill your flight controller. That’s why I highly suggest you order some 470uF 1000uF Multirotor Capacitors. It may very well save your flight controller and it will knock down video noise.
If this is your first BLHeli you will need to learn how to calibrate it. This isn’t difficult to do but it should be done.
Matek F405-Wing (Do not deviate from this)
I’ve always been honest with you. The Matek F405-Wing isn’t my favorite flight controller. My goto Flight Controller is the F405-STD which is a bit more work to setup. If this is your first flight controller, the F405-Wing is great. It’s more than you need at everything plugs instead of being soldered onto the board.

The setup file (end of the document) is for this flight controller. It won’t work with other F405 based flight controllers. Thus, if you want it laid out easily for you, stick with this. It’s a well made flight controller.
You’ll also want a 25V 470uF capacitor that sits between the flight controller and ESC, as close to the ESC as you can get it. The voltage spikes from the ESC will kill your flight controller over time. I’ve lost a few before I learned of this problem. Here’s more info.
This flight controller takes a little time to solder, take your time and do a nice, neat job.
FPV Camera ( Whatever fits your budget)
There is a lot of information online as to what is a good camera. I found that the Foxeer HS1177 fit well and looked great on this plane. And then they stopped making them. There are a lot of great cameras for this plane, and more on the way. If you are confused as to which one to use perhaps figure out a few that may work for you and ask a question about which one would be best in the INAV Fixed Wing Group.

My background is in photography and I’ve spent a fair amount of time studying optics. The thing that’s pushing the FPV camera technology is smart phones. People are taking more and more photos with their phones and quality images are what is desired. The optics for FPV cameras aren’t professional grade, but still not bad. It matches the low resolution the VTX transmits. I will explain some of the terms used.
F 2.(x). F-stop. This is the maximum aperture. This is more important when flying in dark places or poor lighting conditions. There are also some benefits to a faster lens in photographic terms that may not apply to FPV in terms of midrange sharpness.
TVL– Stands for TV Lines. Typically, the higher the TVL the better. That means it’s transmitting higher resolution. There are some 600TVL cameras around and some 800s as well. There are a lot of 1200TVL camera as well.
X.X mm Lens– This refers to field of view. The smaller the number, the wider the field fo view. Quad pilots usually like a wider field of view because they tend to fly in close proximity to objects and need to know what’s around them. With planes we typically want to get a more accurate picture, thus 2.5mm and 2.8mm tend to be sought after if we’re flying high. Lower numbers if you’re flying a lot of proximity flights.
4:3/16:9 – The aspect ratio is determined by the camera. Your goggles or monitor will usually be one or the other. Often FPV cameras are “switchable” but does it mean a switch on the back, or using some OSD programming device that comes with the camera?
NTSC/PAL– The refresh rate of your camera. NTSC refreshes in multiples of 30Hz (30, 60, 120 FPS) and PAL refreshes in multiples of 25Hz (25, 50, 100 FPS). If you are going to be flying near artificial light, such as street lights. It’s a good idea to match the frequency of your countries electricity. So the US is at 60Hz, so you would use NTSC, and places like the UK are at 50Hz, so would use PAL.
VTx
VTX’s are like cameras. There’s a bit more to the subject that meets the eye. Again they aren’t terribly expensive and people certainly have their preferences. My only two suggestions are to keep it light and make sure it has a minimum of 600mW. For now I am sticking with 5.8 GHz.
There are a lot of things you can learn about the VTX. Higher wattage VTX for sale, but they are going to run very, very hot. I know you can look online and see they aren’t that much more expensive, so why not just buy them? Cut your teeth on something 600mW. Keep it cool and most importantly, keep it and the antenna away from your TX and GPS. The VTX will list antenna polarizations. Be sure to learn more about this before you start ordering stuff. You will also want to know about the antenna mounts that are used.

Marc swears by the Matek VTX’s for his INAV AR Wings. I’ve ordered one and am waiting on a plane build to put it into. Anyway, what I can tell you from using the cheap Eachine 600mW VTX and Pogada antennas on the very cheap Eachine VTXs is that the range is around 2KM. I often lose RX reception before the signal goes out. The other thing that to me is a game-changer once again is a capacitor.
If you’re going to be flying with a crew of pilots, talk to them about the VTX. Often they have very specific requirements and sometimes they even assign video channels. The cheaper Eachine VTX’s I love often have half the bands of the more expensive VTXs. So, trust them, and check with them before you order. If you come to us from quads and you’ve flown in groups you know exactly what I am saying.
The other thing that we see in the group on a weekly basis is the following. “I want to build a plane and do long range flights.” The further the plane is from you the higher the chances are that you may never see it again. Do yourself a favor and take baby steps with INAV. Stick with the 1 to 2 KM flights and be happy until you have things figured out.
Good antenna
Antennas are a bit tricky. You’ll want a good omnidirectional antenna with the correct mount for your VTX. Some people swear by the more expensive antennas like the Foxeer Lollipop 3 (shown below), some say that they don’t make much difference. You’ll need to experiment with them to find out what works best for you. There are different placement strategies depending on how you fly. I tend to fly high so I want my antenna to be pointing down.

This all falls in line with INAV Feng Shui. There is an art to good video reception, and it’s you ask different people you get different opinions. I love the Foxeer Lolipop 3. They will be on all my better planes, and most definitely on all my INAV AR Wings
XT60 male connector with silicone wire
If you’ve been flying for a while you have a source for this.
A cable long enough to go from your FPV camera to your flight controller.
You can buy extras online. Foxeer uses a 1.25mm spacing. You can get something long enough to go from the camera to the VTX without a rat’s nest of wires. The wires are black/red/white or yellow. You will need to learn how to swap the red and black. For the F405-Wing the wiring is Red/Black/White or Yellow. If you don’t do this, the camera will fry the first time you plug it into your flight controller.
Here’s a video on how to remove the wires.
Metal Gear 9 gram servos
I use MG90S. They are cheap and analog. I’ve been very pleased with them. You can spend more for so called better servos, and even some metal gear digital servos. Some people have done this in the group, but haven’t come back and proclaimed this is the way to go.
Rx
My go to RX is the FrSky XM+. Cheap and light. Feel free to use what works for you. It just has to be SBUS compatible. The XM+ is very small. In this photo you can see the 3 pin headers without pins in them. You have a choice of right angle or straight pins.

Yes, there are only 3 pins and yes it does 16 channels. That’s the part that’s a bit amazing. These are serial receivers. Imagine if you got one box in the mail, and you opened it and there were two boxes inside. Each of these two boxes, has eight smaller boxes inside. Those 16 little boxes are the channels 1-16, the two larger boxes are the “frames” and all you knew when you brought the box in the house was you had one large box. This receiver can pick up the big boxes many times in a second and send them off to your flight controller to unpack the 16 boxes (or channels). You would think that the flight controller would be working hard to decode all of this many times in a second? Not really, the raw processing power of all of INAV is only a few percent of the full processing power of your flight controller. That’s why I find the SBUS (serial bus) receivers a must for your INAV AR Wing.
GPS
You can use whatever you like. I find the Beitian Dual BN-220 GPS GLONASS is the perfect combination of cheap, light and good. Feel free to get the Matek one or whatever you like.

The thing I will tell you about the BN-220 is that it works well. It’s a cheap Chinese clone without the real UBlox chip inside. Run it on UBlox 7 instead of the UBlox protocol that is setup in the diff file below. It will find satellites a bit faster. I have Galileo turned on, you’ll need it. Change the ground assistance to your part of the world. You may want to remove the decal (as seen in the photo) before gluing it to your INAV AR Wing. The silver part (not shown) faces the sky.
Soldering Supplies
When you go down this road you’re going to need some good soldering supplies. That includes a good iron, video microscope or good magnifying lenses that you put on your head and look like a total dweeb. You’ll need solder, wire, and all sorts of fun supplies. This is a larger subject than we can cover now. You will build up your supplies over time.
E6000
I glue the wings on my INAV AR Wing, this is what I use. It’s a good adhesive.
Decals
You can spruce up your plane with fun decals and make it look even nicer. White usually pops the best
Lamination
Lamination is a love/hate thing. I like it because it helps protect the INAV AR Wing and keeps cuts down on drag. You will want a low melt book lamination that is often sold in large rolls. 3 micron to 5 micron is typically what works best. What isn’t so great is that the plane looks like it’s in a sandwich bag.
Settings
Rates & Expo
| Cruiser Build | Speed Build | Prebuild | |
| Roll Rate | 280 | 450 | 280 |
| Pitch Rate | 120 | 160 | 120 |
| Yaw Rate | 200 | 200 | 200 |
| Roll & Pitch Expo | 70 | 70 | 70 |
| Yaw Expo | 20 | 20 | 20 |
| Max Roll Angle | 45 | 60 | 60 |
| Max Pitch Angle | 30 | 45 | 40 |
| MagHold Rate | 90 | 90 | 90 |
| Manual Roll Rate | 100 | 100 | 100 |
| Manual Pitch & Roll Rate | 100 | 100 | 100 |
PID gains
Proportional
| Name | Cruiser Build | Speed Build | Prebuild |
| Roll | 4 | 5 | 4 |
| Pitch | 5 | 4 | 5 |
| Yaw | 6 | 6 | 6 |
Integral
| Name | Cruiser Build | Speed Build | Prebuild |
| Roll | 10 | 8 | 10 |
| Pitch | 15 | 12 | 15 |
| Yaw | 10 | 10 | 10 |
Derivative
Don’t touch Feed Forward
| Name | Cruiser Build | Speed Build | Prebuild |
| Roll | 40 | 40 | 40 |
| Pitch | 50 | 70 | 50 |
| Yaw | 60 | 60 | 60 |
Warning: Use at your own risk
PIDS & Feed Forwards for the INAV AR Wing
This is a fairly advanced subject for INAV. If you have an AR Wing flying and want to try these, write down your settings and also backup your Diff or Dump file. Give it a try, if it doesn’t work, go back to what did work for you.
The Cruiser and Speed bulbs are from Marc Hoffman. Cruiser is for his long range AR Wing. Speed is for his very fast Air B build. In Rates and Expo I highlighted Max Roll and Max Pitch to show what works well for me because I fly a lot in the horizon mode. In the Pids and Feed Forwards I used Marc’s “Cruiser” settings. The “Prebuild” is what comes in the Diff files (below).
Diff File Instructions
This is for the F405-Wing, for the INAV AR Wing using a BLHeli ESC. It’s appropriate for a motor that is 52g. It is setup to use with the INAV Fixed Wing Group Open TX build with INAV. You will need a TX that not only has OpenTX but has the model we provide for you in the Files section of our Group’s page. There is an excellent PDF from Darren Lines that explains how to set this up. The units are “Imperial” and can be changed in the OSD section. You should also load the Impact font.
If you do not wish to use the OpenTX build from the group, find the # aux and delete just that section. You will have to go in and manually setup the flight modes to work with your RX.
The OSD is my OSD layout. It’s setup for 16:9. Feel free to change it as you please. The first screen is for before arming. The other two are flight modes after arming. It doesn’t show the number of satellites or temperatures. This is all provided as a starting point, feel free to change what you like.
To use this file: Copy the text to a notepad file on our PC, give it a name something like Prototype.txt and save it somewhere you can find it. In the INAV Configurator, go to CLI, then load file, and find the saved file. Click “Execute” and let it go. When you are finished, if it doesn’t automatically reboot type “Save” and it should reboot. The flight controller will be mostly setup. Be certain to calibrate the flight controller after this.
diff
# version
# INAV/MATEKF405SE 2.4.0 Feb 11 2020 / 22:58:10 (bcd4caef9)
# GCC-8.2.1 20181213 (release) [gcc-8-branch revision 267074]
# start the command batch
batch start
# resources
# mixer
mmix 0 1.000 0.000 0.000 0.000
mmix 1 1.000 0.000 0.000 0.000
# servo mix
smix 0 3 0 50 0 -1
smix 1 3 1 50 0 -1
smix 2 4 0 -50 0 -1
smix 3 4 1 50 0 -1
# servo
servo 3 1000 2000 1490 -100
servo 4 1000 2000 1488 100
# logic
# gf
# feature
feature MOTOR_STOP
feature GPS
feature PWM_OUTPUT_ENABLE
# beeper
# map
# serial
serial 3 2 115200 115200 0 115200
# led
# color
# mode_color
# aux
aux 0 0 0 1100 2100
aux 1 1 0 1550 1675
aux 2 2 0 1425 1550
aux 3 3 0 1675 1925
aux 4 9 0 1800 1925
aux 5 8 0 1925 2100
aux 6 35 0 1675 1800
aux 7 10 0 1175 1300
aux 8 27 1 1700 2100
aux 9 28 1 900 1300
aux 10 32 2 900 1300
aux 11 33 2 1300 1700
aux 12 34 2 1700 2100
aux 13 34 4 1300 1425
# adjrange
# rxrange
# temp_sensor
# wp
#wp 0 invalid
# osd_layout
osd_layout 0 0 18 4 V
osd_layout 0 1 13 3 H
osd_layout 0 2 0 0 V
osd_layout 0 7 14 13 V
osd_layout 0 9 1 2 H
osd_layout 0 11 2 1 V
osd_layout 0 12 2 2 V
osd_layout 0 14 8 10 V
osd_layout 0 15 8 3 V
osd_layout 0 24 12 4 V
osd_layout 0 28 12 11 V
osd_layout 0 30 2 14 V
osd_layout 0 38 3 5 H
osd_layout 0 41 1 7 V
osd_layout 0 42 18 3 V
osd_layout 0 45 0 0 V
osd_layout 0 86 1 13 V
osd_layout 1 0 1 3 H
osd_layout 1 1 2 8 V
osd_layout 1 5 23 1 V
osd_layout 1 7 12 2 V
osd_layout 1 8 9 1 V
osd_layout 1 10 1 6 V
osd_layout 1 11 11 12 V
osd_layout 1 12 17 12 V
osd_layout 1 13 23 7 H
osd_layout 1 14 1 1 V
osd_layout 1 15 23 4 H
osd_layout 1 20 6 4 V
osd_layout 1 21 18 4 V
osd_layout 1 22 14 2 H
osd_layout 1 23 1 4 H
osd_layout 1 25 6 5 H
osd_layout 1 26 1 7 H
osd_layout 1 28 23 2 H
osd_layout 1 30 1 3 V
osd_layout 1 31 1 2 V
osd_layout 1 32 2 10 V
osd_layout 1 34 10 1 H
osd_layout 1 35 24 13 V
osd_layout 1 38 2 11 V
osd_layout 1 40 23 3 H
osd_layout 1 46 23 3 H
osd_layout 1 48 23 3 H
osd_layout 1 49 23 4 H
osd_layout 1 53 2 13 H
osd_layout 1 54 2 12 H
osd_layout 1 85 23 7 H
osd_layout 1 86 23 9 V
osd_layout 1 87 23 7 V
osd_layout 1 88 0 12 H
osd_layout 1 105 2 7 H
osd_layout 2 0 3 1 V
osd_layout 2 1 0 0 H
osd_layout 2 3 8 6 V
osd_layout 2 6 22 2 V
osd_layout 2 7 24 13 V
osd_layout 2 9 0 1 H
osd_layout 2 11 3 13 V
osd_layout 2 12 24 11 H
osd_layout 2 13 2 5 V
osd_layout 2 15 24 1 V
osd_layout 2 19 2 14 V
osd_layout 2 22 14 2 V
osd_layout 2 23 1 2 V
osd_layout 2 24 12 3 V
osd_layout 2 26 24 6 V
osd_layout 2 28 22 2 H
osd_layout 2 30 2 11 V
osd_layout 2 32 2 12 V
osd_layout 2 33 23 14 V
osd_layout 2 34 10 1 V
osd_layout 2 37 24 13 H
osd_layout 2 38 2 11 H
osd_layout 2 40 13 5 H
osd_layout 2 41 24 5 V
osd_layout 2 42 2 6 V
osd_layout 2 45 0 0 V
osd_layout 2 49 24 8 H
osd_layout 2 54 1 14 H
osd_layout 2 86 23 2 H
osd_layout 2 87 0 0 H
osd_layout 2 88 0 12 H
osd_layout 2 97 9 15 V
osd_layout 2 99 20 1 H
osd_layout 2 100 25 7 H
osd_layout 3 0 3 2 V
osd_layout 3 2 0 0 V
osd_layout 3 3 8 6 V
osd_layout 3 4 8 6 V
osd_layout 3 9 23 12 V
osd_layout 3 11 2 11 V
osd_layout 3 13 2 5 V
osd_layout 3 15 23 1 V
osd_layout 3 22 27 11 H
osd_layout 3 23 1 1 V
osd_layout 3 25 23 5 V
osd_layout 3 26 24 5 V
osd_layout 3 28 23 2 V
osd_layout 3 30 2 14 V
osd_layout 3 32 2 13 V
osd_layout 3 34 10 1 V
osd_layout 3 38 2 12 V
osd_layout 3 40 23 11 V
osd_layout 3 41 25 6 V
osd_layout 3 42 25 9 H
osd_layout 3 45 0 0 V
osd_layout 3 97 10 15 V
# master
set gyro_hardware_lpf = 256HZ
set gyro_lpf_hz = 40
set acc_hardware = MPU6000
set mag_hardware = NONE
set baro_hardware = BMP280
set pitot_hardware = NONE
set rssi_channel = 16
set motor_pwm_rate = 1000
set motor_pwm_protocol = ONESHOT125
set failsafe_procedure = RTH
set align_board_pitch = 35
set model_preview_type = 8
set small_angle = 180
set applied_defaults = 3
set gps_sbas_mode = AUTO
set gps_ublox_use_galileo = ON
set nav_rth_climb_first = OFF
set nav_rth_allow_landing = NEVER
set nav_fw_bank_angle = 30
set nav_fw_loiter_radius = 6000
set osd_video_system = PAL
set osd_units = IMPERIAL
set osd_rssi_alarm = 0
set osd_time_alarm = 0
set osd_alt_alarm = 0
set osd_dist_alarm = 0
set osd_neg_alt_alarm = 0
set osd_gforce_alarm = 0.000
set osd_gforce_axis_alarm_min = -0.100
set osd_gforce_axis_alarm_max = 0.000
set osd_sidebar_scroll_arrows = ON
set name = AR Wing
# profile
profile 1
set fw_i_pitch = 9
set fw_p_roll = 4
set fw_i_roll = 6
set fw_ff_roll = 40
set max_angle_inclination_rll = 600
set max_angle_inclination_pit = 400
set yaw_lpf_hz = 30
set tpa_rate = 20
set tpa_breakpoint = 1600
set roll_rate = 28
set pitch_rate = 14
# battery_profile
battery_profile 1
# end the command batch
batch end
#
Save
Misc: Prototype plane
Weight 577G (No battery) 707g (w/ 3S 2200mAh battery)
Nose weigh 57g