Final assembly
This is a catch-up week. You will be doing the final assembly and attaching your flight controller to fuselage of your plane and perhaps soldering things in place. You will also need access to your USB port. This should be the easiest week, but it’s also one of the most crucial. Since we had so much to cover in the past, let’s go back and review some things.
Tools
There is a mindset when you first get started with INAV that is very simple, money=more planes. You know you need tools? But, for now, cheap tools help save you money so that you can buy more planes. We see this also with radios as well. Why spend Horus money when you can get by with Jumper or RadioMaster?
What I found from personal experience is that I bought cheap tools and ended up destroying a few flight controllers as I was building them. There are adequate tools that aren’t horribly expensive that do a nice job such as many of the T12 soldering stations. I also started paying for premium solder like Kester. You can find a lot of good information from this video, and find similar tools for less at AliExpress.
Where to put your electronics
There are three pieces of electronics you will have to pay attention to. The GPS, receiver and VTx. How you place them now, and the attention to detail you put into the project will save you time in the long run.
The VTX
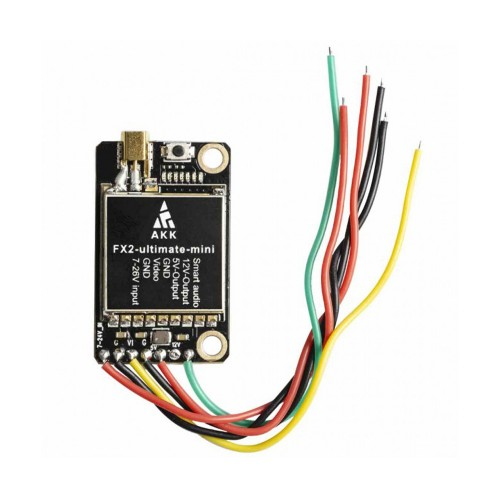
The VTx is really the problem child of your electronics. It’s best not to have the GPS or receiver next to it. Here’s a photo of the VTX we suggested for the S800 build.
Yes, lots of wires. What do they all do?
Green This is a SmartAudio wire. You hook it up to a spare UART Tx on your flight controller. With this you will be able to control the power levels and channels on your VTX from your transmitter. You can also use logic conditions to control the power based on distance from home. Darren Lines explains how to do the ultimate setup in his video. It’s based on both altitude and distance.
Yellow Video in from your flight controller
Red and black Of course you know that red is power and black is ground. But why two sets? One is power in. This is something like 7V-26V from your flight controller or PDB. The other set of wires are 5V and ground out that goes to your video camera. This 5V is filtered.
So, what’s the minimum you’ll need? You’ll need the ground and power from your flight controller or PDB, and of course the video out. So, you only really need 3 wires. The Smart Audio is optional and you may be able to pull 5V and ground elsewhere if push comes to shove.
The VTX likes to stay cool, thus having it somewhere with good airflow is important. For the S800 the bays on the wing are a natural choice.
GPS modules
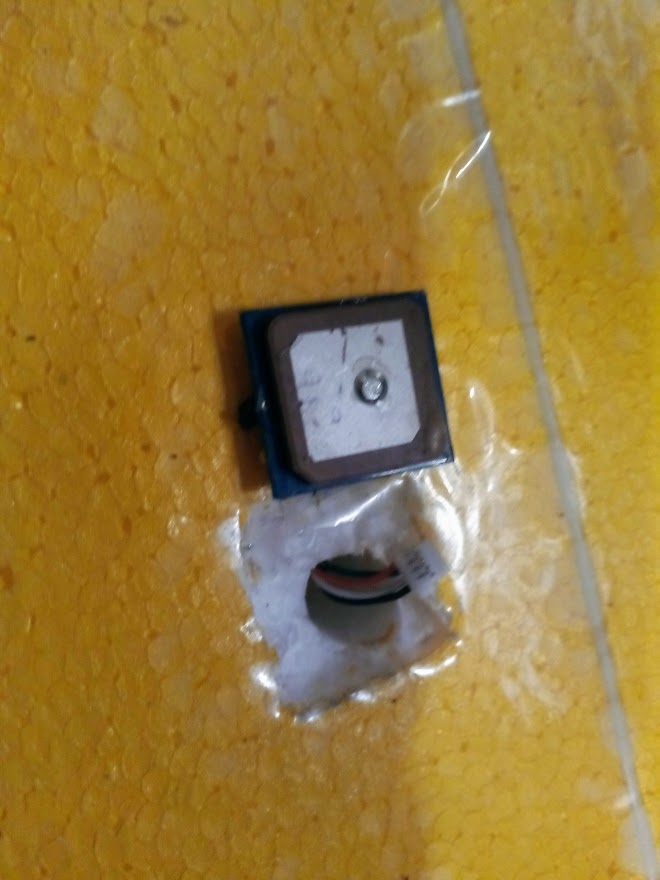
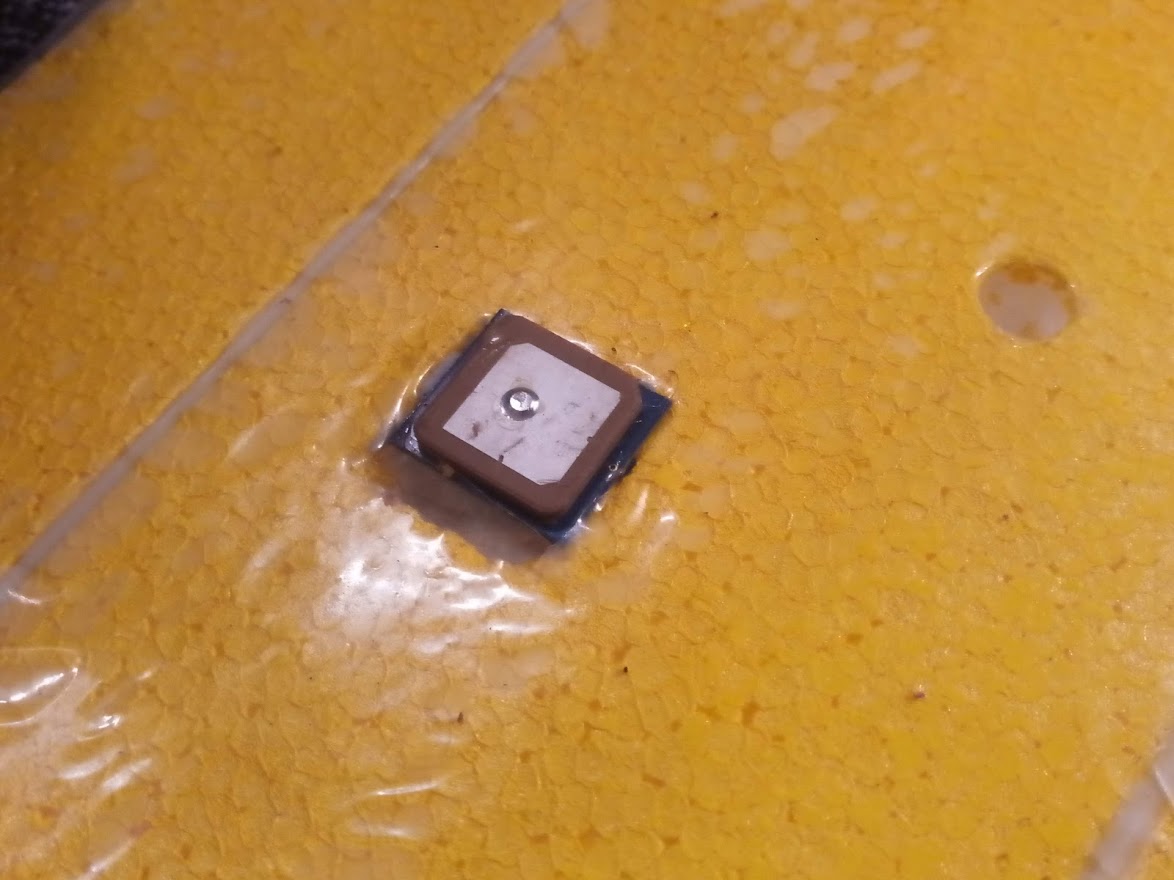
It’s fairly common to place the VTX toward the middle of the fuselage. Some people put them on the bottom of the plane. I’ve had mixed results doing that and thus I tend to always have them on the top of the plane.
To avoid having ugly wires ruining the look of the plane. I run the wires on the bottom of the plane. To do this, I cut in a channel and here’s the million dollar secret. I find a drill bit that is 7mm or a quarter inch. Then, when the wife isn’t looking I take it to the stove and hold the drill side with a pair of pliers. I let the shank get very hot after holding it to the flame for around a minute or two. Then I use this hot drill bit shank to burn a perfect circular hole into the foam so that the wires can run freely from the bottom of the plane to the top of the plane. Then I cut the square on the wing where the GPS will go. I want it to be half-way recessed. This will make minimal airflow disturbances on the wing. Note: The photos are from a Raphax build.
Receiver
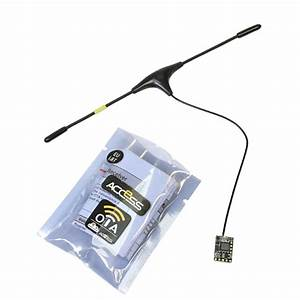
You are going to make a long run of 3 wires from your flight controller to your receiver. 4 if you want to use telemetry. You can put it out on the wing. There are a nice set of holes in the wings for your antenna. For extra credit, 3D print the collet that goes between your antenna and the wing.
FPV Camera
Don’t put that heated drill bit away just yet. You will need to poke a hole into the firewall of your FPV camera compartment. You can use a hot nail to route a channel under where the battery will sit. It’s a short run from your flight controller to your camera. I ran mine from the bottom of the plane and poked the hole from the bottom of the plane. Avoid the rat’s nest of wires.
The S800 gets messy with wire very quickly. Some planes can handle it better than others. This plane simply cannot. After you test your setup, plane on for an hour if not two cleaning up your wire installation. Some people even go as far as cutting their wire down to length and re-soldering them into place.
You will also be ensuring that the following work:
- VTX
- Camera
- GPS
This is when you plug everything in for the first time. There is a tool known as a Smoke Stopper that prevents your flight controller from getting power should there be a short. If you don’t have one, take your time and check all your connections with a multimeter. At the very least, the battery ground and VCC shouldn’t have continuity between them. If you want to hedge your bets, unplug your VTx and video camera before plugging in your flight controller to your flight pack. Then you can go back and plug in your VTx, FPV camera and GPS. You will need to unplug your battery before plugging in these other electrical items.
When it comes to your VTX, never power it up without an antenna.
The magic smoke show
If you see a spark and a poof and a bit of white smoke, whatever went up is dead. It’s usually the flight controller. So, the first question, can it be fixed? No, it’s dead. Yes, this does happen, and its painful get this far and have it happen. But, it happens to all of us at one point or another. Learn from your mistakes and move on. Learn the lesson and get a smoke stopper.
It fires up, but not everything is working
It’s fairly common to not have things working quite like they should when you first plug everything in. Don’t worry, this can all be fixed.
The VTx
If the VTx lights up, you’re in good shape. Even if you wired it up wrong you should at least get a black screen on your monitor. This means that the VTX is broadcasting but the video signal isn’t coming from the flight controller. Check your cables again.
If you see the OSD at first but after the bootup there is no OSD. This means that you haven’t loaded your font, or you have a PAL Camera when you have an NTSC Camera or vice versa. They are often switchable, but you need to hook up cables and go through the camera’s OSD menu to switch them. Whichever type of camera, the setting on the camera and in iNav need to match.
No camera, but OSD
Check your cabling to your camera.
No GPS
In the INAV Configurator, you need to make certain that you enable the GPS and the icon on the top of the screen is blue and not red. If your GPS lights up it’s a good sign. If it’s not working, often you just have your Tx and Rx cables backwards.
No receiver
Setting up your receiver the first time in INAV may take some time. You use the receiver tab to change settings. Our manuals explain how to setup a radio. If you get stuck, be sure to ask questions. Leslie Yagin will help you as well in the group if you would rather talk to someone one-on-one. You will need to perform a High Five Test. There still are a couple of weeks before we get flying. You have time to work out the bugs.
You will need to make the following adjustments
- Servos turn the right direction (You can be reverse them in the outputs tab)
- ESC has a firmware you like, if not, update it now
- Calibrate the throttle (If you are using BLHeil, there are many introductory videos that are mostly for quad pilots. You don’t have to mess with the motor timings, but should be able to do things like set the brake, change motor direction and calibrate the throttle)
- Adjust motor direction for the prop
FPV Camera
The set up of the camera takes a little work. They need to carve out the foam to fit it. Plus, to run the cables, they need to melt a hole through the front wall of the battery area into the camera bay. I’d also recommend melting a channel along the side of the camera bay to put the cables in. So they’re out of the way.
What to tackle
- VTx You want the VTx to work first. This is because you can get information from the OSD, for what is happening; without connecting to your computer.
- Camera Though it’s not all that important at this stage, since you’re working on the VTX, get the camera working next.
- Receiver You want to make sure you can move your servos. Don forget to switch on “enable outputs” in the outputs tab.
- GPS Your plane won’t arm without the GPS working. But you can check your servo movements and warnings in your OSD. You will need to be close to a window or outside to get your GPS to recognize satellites.
When you can arm your plane, crack open a beer. You’ve earned it!
Downloads
Here are two files to use for your plane.
The first is the STL file for winglets. These are 3D print files and they will take a bit of time to print. They were provided by Christian Moe and they are every bit worth the effort.
The second file is the central fins, also from Christian Moe. You should cut these out of Coroplast. Is a plastic material like corrugated boxes. What they do is help the plane track.
The winglets are the must have item, it really prevents the plane from having yawing issues when flying which is common for the S800.
This is a picture of one of Christian’s builds You can see the winglets and central fins. He also used wood elevons. You use Balsa Wood to make the elevons and then use lamination to coat it. He also used thicker rods for the control rod. The motor mount extensions were part of our initial parts list.
